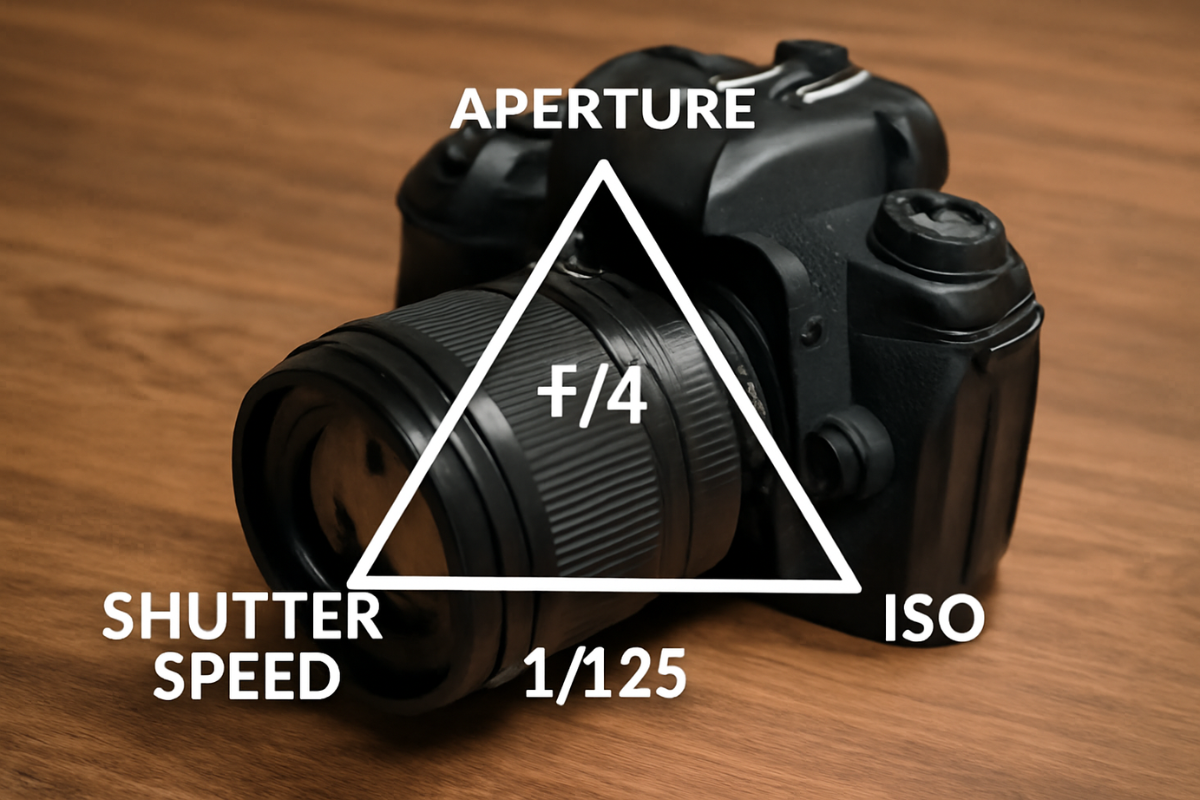
Mastering the exposure triangle is essential for every photographer, as it controls how light interacts with your camera and affects the final image. The three components—Aperture, Shutter Speed, and ISO—work together to determine the exposure and aesthetic of your photo. In this article, we’ll break down each element of the exposure triangle and show you how to use them to create the perfect shot.
1. Aperture: Control Your Depth of Field
The aperture is the opening in your lens through which light passes into the camera. It’s measured in f-stops, and the size of the opening determines how much light is let in. Aperture also controls the depth of field (DOF), which is how much of your image is in focus.
- Wide Aperture (low f-stop like f/1.8): A wide aperture allows more light to enter the camera, which is useful in low-light conditions. It creates a shallow depth of field, which blurs the background and isolates your subject. This is perfect for portrait photography.
- Narrow Aperture (high f-stop like f/16): A narrow aperture allows less light in, which is great for bright conditions. It also creates a deep depth of field, meaning both the foreground and background will be in focus. This is ideal for landscape photography.
Choosing the right aperture depends on the effect you want to achieve. For portraits, a wide aperture helps focus attention on the subject, while a narrow aperture is better for capturing landscapes in sharp detail.
2. Shutter Speed: Freeze or Blur Motion
Shutter speed determines how long the camera’s sensor is exposed to light. A fast shutter speed means less exposure time, while a slow shutter speed means more exposure time.
- Fast Shutter Speed (e.g., 1/1000s): A fast shutter speed is ideal for freezing motion. This is useful for sports, wildlife, or any fast-moving subjects. It ensures your photos are sharp, with no motion blur.
- Slow Shutter Speed (e.g., 1/30s): A slow shutter speed allows more light into the camera and can create motion blur. This is great for capturing the motion of water, clouds, or lights at night. You can also use slow shutter speeds to achieve long exposure effects.
To achieve a proper exposure with a slow shutter speed, you may need a tripod to avoid camera shake.
3. ISO: Adjusting Your Camera’s Sensitivity to Light
ISO controls the sensitivity of your camera’s sensor to light. A lower ISO is less sensitive to light and provides cleaner, sharper images, while a higher ISO increases sensitivity but can introduce noise (grain).
- Low ISO (e.g., 100): Low ISO is ideal in bright lighting conditions where there is plenty of natural light. It results in clearer images with minimal noise. It’s best for landscape or portrait photography in daylight.
- High ISO (e.g., 1600 or above): High ISO is useful for low-light conditions, such as indoor or night photography. However, it introduces noise, which can degrade image quality. Modern cameras have improved noise control at higher ISOs, but it’s still important to find the right balance.
When using a high ISO, it’s crucial to be mindful of noise, especially in areas of the image that are dark or in low-contrast scenes.
4. How Aperture, Shutter Speed, and ISO Work Together
The three components of the exposure triangle are interrelated and must be balanced to achieve a correct exposure. Here’s how they interact:
- Aperture and Shutter Speed: A wide aperture allows more light in, so you can use a faster shutter speed. Conversely, a narrow aperture lets in less light, so you may need to use a slower shutter speed to compensate.
- ISO and Exposure: Increasing your ISO allows you to shoot at faster shutter speeds or with narrower apertures in low-light conditions. However, increasing ISO too much can lead to unwanted noise in the image.
By adjusting these three settings together, you can control the exposure, depth of field, motion, and noise in your photos.
5. Experimenting with the Exposure Triangle for Creative Effects
Once you have a grasp of the basics, you can start experimenting to create artistic effects. Here are some ideas:
- Shallow Depth of Field: Use a wide aperture (e.g., f/1.8) for portraits to blur the background and make your subject stand out.
- Motion Blur: Use a slow shutter speed (e.g., 1/30s) to capture the movement of water, traffic lights, or any subject with motion.
- Low-Light Photography: Increase your ISO and use a wide aperture or slow shutter speed to capture clear images in dimly lit environments.
By understanding the exposure triangle, you can create a variety of photographic effects, from capturing crisp motion-free images to adding blur and artistic flair to your photos.
Conclusion
Mastering the exposure triangle is a crucial skill for photographers of all levels. By understanding how aperture, shutter speed, and ISO work together, you can control the exposure, depth of field, motion, and noise in your photos. Experimenting with different settings will help you develop your unique style and create stunning images in any lighting situation. So, get out there and start practicing—the more you experiment, the more control you’ll gain over your photography!