Exposure is one of the fundamental concepts in photography, and understanding how it works is crucial for producing well-lit, balanced images. Exposure determines how much light hits your camera’s sensor, directly influencing the brightness and detail of your photos. Whether you’re a beginner or an experienced photographer, learning how to control exposure is essential for mastering your craft. In this guide, we’ll break down what exposure is, how it works, and how you can control it to improve your photography.
What Is Exposure?
In simple terms, exposure refers to the amount of light that reaches your camera’s sensor (or film, in traditional photography). The exposure level of an image determines its brightness, and achieving the correct exposure is key to getting clear, sharp images without overexposure (too bright) or underexposure (too dark).
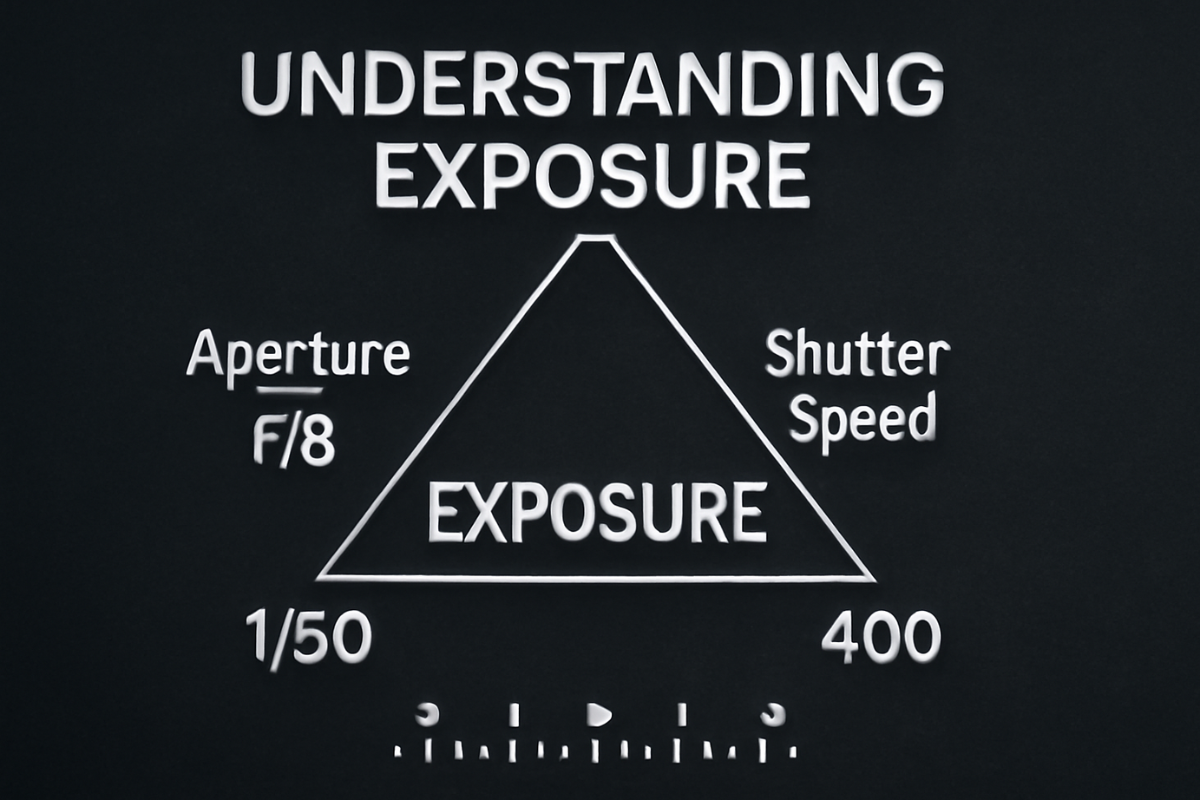
The Exposure Triangle: The Three Pillars of Exposure
Exposure is controlled by three key settings on your camera: aperture, shutter speed, and ISO. Together, these three settings form what is known as the exposure triangle. Understanding how each of these settings works and how they interact with one another is essential for controlling exposure in your photos.
1. Aperture
Aperture refers to the size of the opening in the lens through which light passes to reach the camera’s sensor. The size of the aperture affects not only the exposure but also the depth of field (the range of distance in the image that appears sharp).
- Larger Aperture (Smaller f-number): A larger aperture (e.g., f/2.8) allows more light to enter the camera, resulting in brighter images. This is great for low-light situations or when you want a shallow depth of field to blur the background and focus attention on your subject.
- Smaller Aperture (Larger f-number): A smaller aperture (e.g., f/16) lets in less light, which is useful for bright conditions or when you want a larger depth of field to keep both the foreground and background in focus.
2. Shutter Speed
Shutter speed is the amount of time your camera’s shutter remains open to allow light to reach the sensor. It is measured in fractions of a second (e.g., 1/500s) or in full seconds for longer exposures.
- Fast Shutter Speed: A fast shutter speed (e.g., 1/1000s) freezes motion, preventing blur in fast-moving subjects. It’s ideal for capturing fast action, like sports or wildlife photography.
- Slow Shutter Speed: A slow shutter speed (e.g., 1/30s or longer) allows more light to hit the sensor, which is useful in low-light conditions or when you want to create motion blur, such as the flowing movement of water or light trails from cars.
3. ISO
ISO refers to the sensitivity of your camera’s sensor to light. A lower ISO value (e.g., 100) means the sensor is less sensitive to light, resulting in cleaner, sharper images with less noise. A higher ISO (e.g., 3200) makes the sensor more sensitive to light, which is useful in low-light situations but can introduce more noise (graininess) into your images.
- Low ISO (e.g., 100): Best for bright lighting conditions and situations where you want the highest image quality with minimal noise.
- High ISO (e.g., 1600 or higher): Useful for low-light conditions or when you need to use faster shutter speeds, but it may result in more noise, especially in darker areas of your photo.
The Relationship Between Aperture, Shutter Speed, and ISO
The three elements of the exposure triangle—aperture, shutter speed, and ISO—work together to determine the overall exposure of an image. Adjusting one of these settings requires compensating for it with one or both of the other settings to maintain the same exposure.
For example, if you choose a smaller aperture (higher f-number) to achieve a greater depth of field, you’ll need to either reduce your shutter speed (to allow more time for light to hit the sensor) or increase the ISO to maintain the correct exposure.
Here’s an example:
- You’re shooting a scene with a f/8 aperture. To maintain the same exposure, you might need to lower your shutter speed to 1/250s or increase your ISO to 400.
The key is finding the right balance between these three settings for your specific shooting conditions.
How to Achieve Proper Exposure
Achieving proper exposure is all about striking the right balance between aperture, shutter speed, and ISO, so your image is neither too bright nor too dark. Here are some tips to help you achieve the correct exposure:
1. Use Your Camera’s Metering System
Most digital cameras have a built-in metering system that evaluates the scene and gives you a recommended exposure. This metering system typically displays a scale in the viewfinder or on the LCD screen, indicating whether the image is properly exposed.
- Zero on the scale indicates a balanced exposure.
- To the left indicates underexposure (too dark).
- To the right indicates overexposure (too bright).
By adjusting your aperture, shutter speed, and ISO, you can fine-tune the exposure until the meter shows a proper balance.
2. Bracket Your Exposure
Sometimes, the lighting conditions are tricky, and it’s hard to get the perfect exposure in a single shot. In these cases, you can use a technique called bracketing, where you take multiple photos at different exposure settings (underexposed, properly exposed, and overexposed) and choose the best one. This is especially useful when shooting in high-contrast environments or in scenes where you’re unsure of the ideal exposure.
3. Use Exposure Compensation
Most cameras allow you to adjust the exposure manually using the exposure compensation feature. This allows you to adjust the exposure based on the camera’s metering system. If your photo looks too dark, you can increase the exposure compensation (+1 or +2), and if it looks too bright, you can decrease it (-1 or -2).
4. Check the Histogram
The histogram is a graphical representation of the tonal values in your image, from shadows (on the left) to highlights (on the right). By checking the histogram, you can ensure that you’re not losing detail in the shadows or highlights.
- A well-balanced histogram shows a range of tones without clipping at either end.
- If the histogram is too far to the left, your image is underexposed (too dark).
- If it’s too far to the right, your image is overexposed (too bright).
5. Understand the Lighting Conditions
The available light plays a significant role in determining the exposure settings. In bright daylight, you may need a smaller aperture (higher f-number) and a faster shutter speed. In low light, you may need to open up the aperture, slow down the shutter speed, or increase the ISO to gather enough light.
Conclusion: Mastering Exposure in Photography
Understanding exposure is essential for any photographer who wants to take creative control of their images. By mastering the exposure triangle and learning how to balance aperture, shutter speed, and ISO, you can capture images that are perfectly exposed, regardless of the lighting conditions. Experimenting with these settings and practicing in various environments will give you a better sense of how to adjust exposure creatively and effectively.
Whether you’re shooting portraits, landscapes, or fast-moving action, the key is to understand how each of these elements affects your photo and how they work together. With a little practice, you’ll soon be able to handle exposure with ease and take your photography skills to the next level.