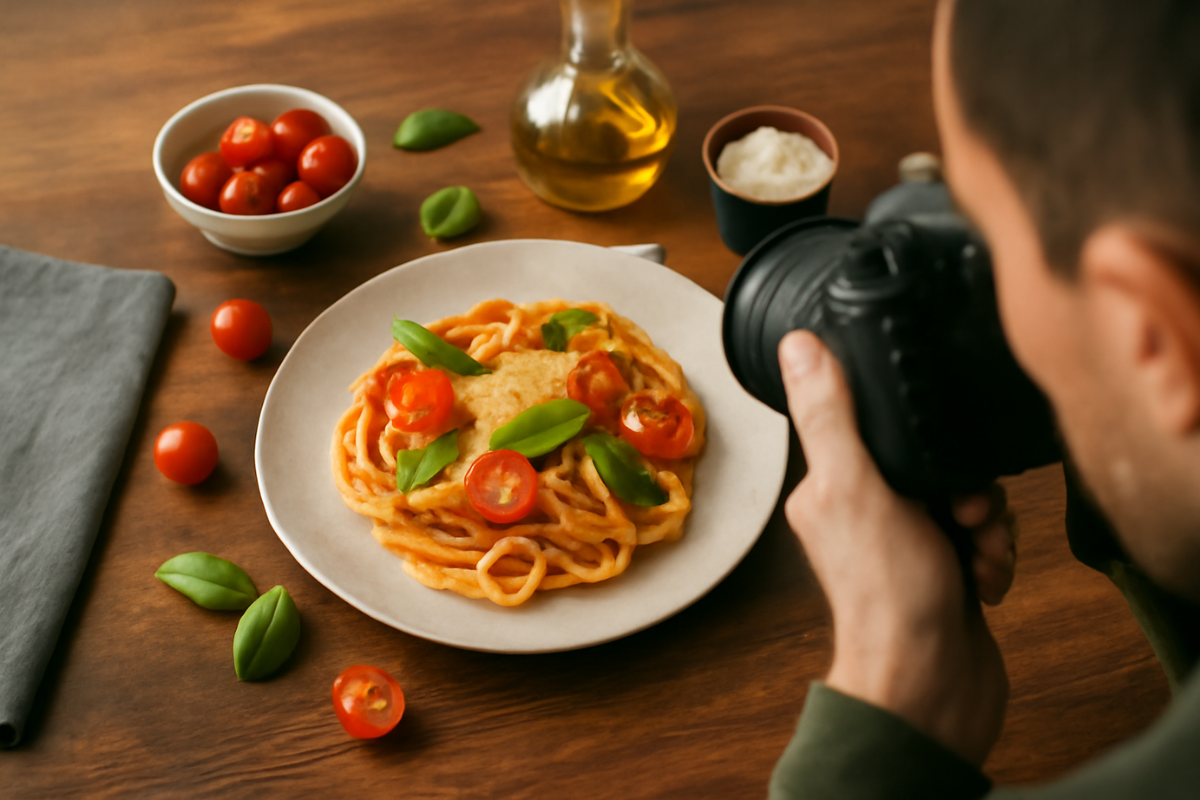
Food photography is an art form that can transform the simplest meal into a mouth-watering masterpiece. Whether you’re a professional photographer, a food blogger, or simply someone who loves capturing their culinary creations, the way food is presented in a photograph can make all the difference. The goal of food photography is not just to showcase the dish, but to evoke an emotional response that makes the viewer want to reach out and take a bite.
In this article, we’ll explore some essential tips and techniques to elevate your food photography and make your images truly irresistible.
1. Lighting Is Key
The most important factor in food photography is lighting. It can make or break the appeal of your photos. Good lighting can enhance the texture, color, and details of the food, while poor lighting can make even the most delicious dish look unappetizing.
Natural Light vs. Artificial Light
- Natural Light: Whenever possible, try to shoot food using natural light. Natural light is soft and flattering, making it perfect for capturing the true colors and textures of food. A large window with indirect sunlight is ideal for food photography.
- Artificial Light: If you’re shooting indoors and natural light is unavailable, you can use artificial lighting, such as softboxes or ring lights. Just be mindful of the light’s intensity and position. Avoid harsh, direct light that can create unwanted shadows or reflections on the food.
- Diffusing Light: If the natural light coming through the window is too harsh, use a diffuser (like a white sheet or parchment paper) to soften the light. This creates a more flattering look and eliminates harsh shadows.
Experiment with Different Angles
Lighting can also be affected by the angle you shoot from. In food photography, different angles can completely change how a dish looks, so it’s essential to experiment with various perspectives.
- Top-Down Shots: A top-down view is great for showcasing flat dishes like pizzas, salads, or any food with a variety of ingredients that can be arranged in a visually appealing way. This perspective allows you to highlight all the components of the dish in one frame.
- Side Angle: Shooting from the side is perfect for dishes with height, like burgers, cakes, or layered desserts. It helps convey the textures and layers, allowing the viewer to see the inside of the dish.
- 45-Degree Angle: This is often the most versatile and natural angle, providing a balance between top-down and side shots. It’s ideal for dishes served in bowls, cups, or glasses.
2. Styling Your Food
Good food styling makes a huge difference in how your food looks in a photograph. Styling isn’t just about making the dish look pretty—it’s about conveying a story or mood that complements the food.
Keep It Simple
When styling food, less is often more. Avoid overcrowding the plate with too many garnishes or accessories. Instead, focus on a few key elements that highlight the food’s natural beauty. Simple, elegant styling can make a dish appear more refined and appealing.
Use Props Wisely
Props can enhance the mood and context of your food photography, but they should never steal the show. Use props like cutlery, napkins, or drink glasses sparingly, ensuring they complement the food rather than overwhelm it. A rustic wooden table, a simple plate, or a few fresh herbs can do wonders for making your food look inviting.
- Tip: For desserts or drinks, think about including complementary elements like a spoon, a cup, or a napkin to add context.
Pay Attention to Texture and Details
Texture is one of the most important aspects of food photography. A dish’s texture can make it look more appetizing and can be highlighted by good lighting and close-up shots. Don’t be afraid to capture the fine details, such as the creaminess of a sauce, the crispness of vegetables, or the fluffiness of a cake.
- Tip: Use close-up shots to show intricate details like the steam rising from hot food, the drizzle of chocolate over dessert, or the texture of freshly baked bread.
3. Composition and Framing
Composition refers to the way elements are arranged within the frame. Good composition is crucial for making your food photos look professional and engaging.
The Rule of Thirds
The rule of thirds is a basic compositional principle that suggests dividing your frame into a 3×3 grid. Place your food and any important elements along these lines or at their intersections. This creates a sense of balance and helps avoid a cluttered or overly centered composition.
- Tip: For dynamic photos, place the food off-center and let the surrounding elements fill the frame naturally.
Negative Space
Incorporating negative space (the empty space around the subject) can draw attention to the food and create a sense of elegance and simplicity. Don’t be afraid to leave space around your subject to make it stand out more.
- Tip: Use negative space to create a minimalist composition that focuses on the dish itself, or to highlight the context, like the environment around the food.
Framing and Leading Lines
Using the environment to frame the dish can add depth to your images. For example, you could use a table, a bowl, or even a utensil to frame the dish. Leading lines (like the edge of a table or a spoon leading towards the plate) can guide the viewer’s eye directly to the food.
- Tip: Use the natural lines of the table or the rim of a plate to guide the viewer’s focus toward the food.
4. Color and Contrast
Color plays an important role in food photography, as it can evoke different emotions and feelings. The right use of color can make your photos look more vibrant and appealing, while poor color choices can make a dish look bland or unappetizing.
Complementary Colors
Use complementary colors to make your food stand out. For example, green vegetables look great next to the rich reds and yellows of tomatoes or peppers. If your food is one solid color, consider incorporating colorful garnishes, herbs, or drinks to add vibrancy to the image.
- Tip: Pay attention to the color of the plates and backgrounds. Neutral backgrounds (like wood or white) can help colorful food pop, while dark backgrounds create a more dramatic mood.
Play with Contrast
Contrast not only applies to color but also to texture. A smooth sauce contrasts nicely with a crunchy topping or crispy texture. Similarly, a vibrant salad can stand out against a muted background. Contrast helps to add depth to the image, making the food look more appetizing and three-dimensional.
5. Post-Processing and Editing
Even if you’ve captured the perfect shot, post-processing is key to making your food photos truly irresistible. Here are a few simple editing tips to elevate your images:
Adjust Exposure and Brightness
If your photos are too dark or too light, adjust the exposure to get the perfect balance. Increasing the brightness can make the image more vibrant, but be careful not to overdo it, as it can wash out the details.
Enhance Colors and Details
Use editing software to enhance the colors of the food. Increasing the vibrance or saturation can make the dish appear more lively and fresh. You can also sharpen the image to bring out the fine details and textures of the food.
Remove Distractions
Remove any distractions or imperfections in the background that could take away from the food. Use tools like the healing brush or clone tool to clean up small blemishes, crumbs, or objects that don’t belong.
Conclusion: Capturing Irresistible Food Photos
Food photography is a powerful way to showcase your culinary creations or food-related work. By focusing on lighting, styling, composition, color, and post-processing, you can create images that not only highlight the food but make it irresistible. Whether you’re photographing a plated dish or a simple homemade meal, the key is to make the viewer feel as though they can taste the food through the photo.
Experiment with different techniques, angles, and settings, and don’t be afraid to take the time to perfect your shots. With practice and attention to detail, you’ll soon be able to create food photography that truly stands out.