Landscape photography allows you to capture the majestic beauty of nature, from sweeping vistas and towering mountains to tranquil lakes and forests. It’s a genre that invites creativity, patience, and a deep appreciation for the natural world. Whether you’re shooting a sunrise over a mountain range or a peaceful beach at dusk, landscape photography has the power to transport the viewer into the scene, allowing them to experience the beauty you’ve captured.
For beginners, landscape photography might seem intimidating, but with the right tools, techniques, and mindset, anyone can capture stunning images of the natural world. In this article, we’ll explore essential tips and tricks to help you master landscape photography.
1. Choose the Right Time of Day
One of the most crucial elements of landscape photography is the timing of your shoot. Light plays an enormous role in how your landscape images will turn out, and the quality of light changes dramatically throughout the day. The right lighting can transform a scene, while poor lighting can make even the most beautiful landscapes look flat and dull.
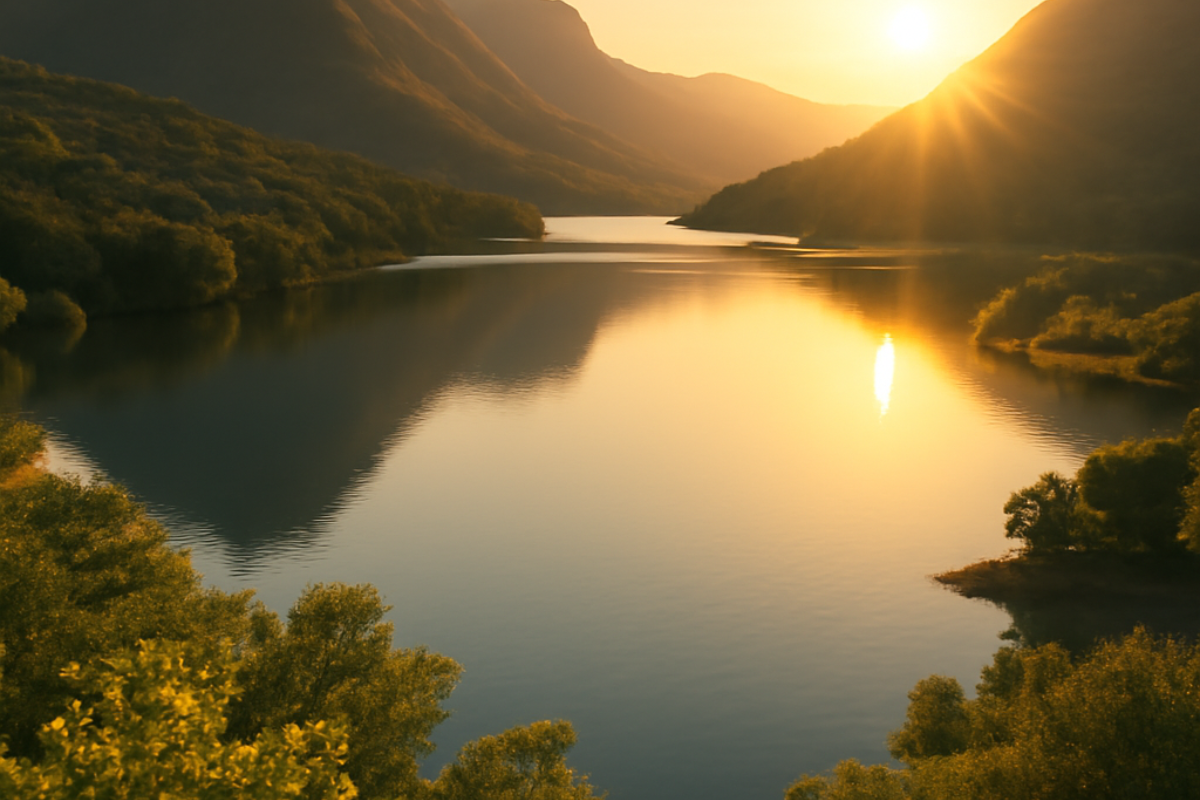
Golden Hour:
The golden hour, which occurs shortly after sunrise and before sunset, provides the best light for landscape photography. During this time, the sun is low in the sky, casting a soft, warm light that adds depth and richness to your images. The long shadows and soft highlights during golden hour are perfect for creating dramatic, yet peaceful, landscape shots.
Blue Hour:
The blue hour takes place just before sunrise and after sunset when the sky is illuminated with deep blue tones. This period of light can provide a cool and serene atmosphere, perfect for capturing the tranquility of nature.
Midday Light:
While golden hour is ideal, sometimes you’ll need to shoot during midday when the sun is high. In such cases, use a polarizing filter to reduce harsh reflections and increase contrast in the sky, which helps in making the colors pop. Be mindful of the harsh shadows that midday light can create and try to avoid them by adjusting your angle or composition.
2. Use the Right Gear
While it’s possible to capture stunning landscapes with a smartphone, having the right equipment can greatly enhance the quality of your shots. Here’s a list of essential gear for landscape photography:
- DSLR or Mirrorless Camera: A good camera will allow you to shoot in manual mode and capture high-quality images. Look for a camera with a large sensor and high dynamic range to capture details in both the shadows and highlights.
- Wide-Angle Lens: A wide-angle lens (e.g., 16-35mm or 24-70mm) is perfect for landscape photography because it allows you to capture expansive scenes. It gives you the ability to emphasize foreground elements while including the vastness of the background.
- Tripod: A tripod is essential for stability, especially in low-light conditions or when using slower shutter speeds. It ensures that your images are sharp and free from motion blur.
- Filters: Consider using a polarizing filter to reduce glare and enhance the colors of the sky and foliage. A neutral density (ND) filter can also be useful to create long exposures in daylight, allowing you to capture the movement of water or clouds.
- Remote Shutter Release: To avoid camera shake when pressing the shutter button, use a remote shutter release or the camera’s self-timer.
3. Understand Composition Techniques
Good composition is key to creating captivating landscape photographs. A well-composed image guides the viewer’s eye through the frame and adds a sense of balance and harmony. Here are some composition techniques to keep in mind:
Rule of Thirds:
The rule of thirds is a simple yet powerful composition technique. Imagine dividing the frame into nine equal parts using two horizontal and two vertical lines. Place the most important elements of your scene along these lines or at their intersections. This creates a balanced and visually pleasing composition.
Leading Lines:
Use natural lines in the landscape to lead the viewer’s eye through the frame. These lines could be roads, rivers, fences, or even shadows. Leading lines help add depth to the photo and create a sense of movement.
Foreground Interest:
Including strong foreground elements can add depth and perspective to your image. Look for interesting rocks, flowers, trees, or textures to anchor your composition and draw the viewer into the scene.
Framing:
If possible, use elements of the landscape to frame your subject. For example, shooting through branches or archways can add depth and focus attention on the main subject.
Symmetry:
Sometimes, symmetry in nature, such as a perfectly mirrored reflection in a lake, can create striking and powerful compositions. Look for moments when the scene itself creates symmetry.
4. Control Your Exposure
Landscape photography often involves scenes with a wide range of light intensities, such as bright skies and dark foregrounds. Controlling your exposure ensures that you capture all the details in both the light and dark areas of the image.
Use the Histogram:
The histogram is a valuable tool for checking the exposure of your image. It shows the distribution of light and dark areas. Aim for a well-balanced histogram that doesn’t show clipping at either the dark or bright ends, unless you intentionally want to create high contrast.
Manual Mode:
Shooting in manual mode gives you full control over the exposure settings. Start by adjusting your aperture (f-stop), shutter speed, and ISO to achieve the desired exposure. A smaller aperture (higher f-stop number) will give you a larger depth of field, ensuring that both the foreground and background are in focus.
Bracketing:
For scenes with a high dynamic range, such as a sunset over a mountain, try exposure bracketing. This involves taking multiple shots at different exposure levels (underexposed, properly exposed, and overexposed) and then merging them in post-processing to create a well-balanced image with greater detail in both shadows and highlights.
5. Pay Attention to Weather Conditions
Weather plays a significant role in landscape photography, and understanding how different weather conditions affect your images can help you take better photos.
- Cloudy Days: Soft, diffused light on overcast days can create an even and flattering look for landscapes, reducing harsh shadows and highlights. This type of light works especially well for moody, atmospheric scenes like forests or lakes.
- Stormy Weather: Storms can add drama to your photos. Dark clouds and rain can create a sense of intensity and movement. Just make sure to keep your equipment safe from the elements.
- Clear Skies: Clear, bright skies can be beautiful, but they may lead to high contrast and washed-out colors. A polarizer filter can help reduce glare and enhance the colors in the sky, and shooting during the golden hour will help soften the light.
6. Post-Processing Your Landscape Photos
Post-processing is an essential part of landscape photography. It allows you to fine-tune the image and bring out the details and colors that may not have been fully captured in-camera.
- Enhance Colors: Adjusting the saturation and vibrancy can make the colors of the landscape pop, especially the greens of trees or the blues of the sky and water.
- Adjust Exposure: Fine-tune the exposure and contrast to make sure you have a balanced image, particularly in scenes with a wide range of light.
- Sharpening and Noise Reduction: Apply sharpening to enhance details, particularly in the foreground. Use noise reduction if you’ve used higher ISO settings to ensure your image remains clean.
Conclusion
Landscape photography offers endless opportunities to capture the beauty of nature, but it requires an understanding of light, composition, and technical skills. By choosing the right time of day, using the proper gear, mastering composition techniques, and paying attention to exposure and weather conditions, you can create stunning images that showcase the awe-inspiring beauty of the world around us. With practice and patience, you’ll be able to tell the story of nature through your lens and produce memorable landscape photos.