Light is the foundation of every photograph. Without it, photography wouldn’t exist. In fact, light defines the mood, shapes the subject, and sets the tone for your images. Understanding how to manipulate and use light effectively is one of the most powerful skills you can develop as a photographer. Whether you’re shooting portraits, landscapes, or products, the way light interacts with your subject can make the difference between an average photo and a stunning one.
In this article, we will explore the importance of light in photography and how you can use it to your advantage.
1. Understanding Different Types of Light
Before diving into how to use light, it’s essential to understand the different types of light you’ll encounter when photographing. There are several main categories of light that affect your images:
Natural Light
Natural light refers to the sunlight that comes from the sun, and it is often used for outdoor photography. Natural light varies throughout the day, with different qualities at different times:
- Golden Hour: The soft, warm light during the hour after sunrise and before sunset. This light is flattering and creates long, dramatic shadows.
- Midday Light: The harsh, direct light when the sun is high in the sky. It creates strong contrasts and deep shadows, which can be challenging to work with unless you are aiming for a bold effect.
- Overcast Light: On cloudy days, the clouds act as a natural diffuser, resulting in soft, even light. This is ideal for portraits and is often considered the most flattering for skin tones.
Artificial Light
Artificial light is produced by sources such as light bulbs, flash, or studio lighting. While natural light is beautiful, artificial lighting offers more control and consistency. Some common artificial light sources include:
- Continuous Light: This type of light remains constant, such as LED or tungsten lights. It’s helpful because you can see how the light interacts with your subject in real-time.
- Flash: Flash lighting is a popular choice for portraiture or in low-light conditions. It’s intense and powerful, offering a burst of light to illuminate your subject.
- Softboxes and Umbrellas: These modifiers are used to diffuse artificial light, softening shadows and creating a more flattering effect on your subject.
Each type of light has its own qualities, and learning to use them properly is crucial in mastering photography.
2. Direction of Light: How It Affects Your Image
The direction of light is just as important as the type of light. The way light falls on your subject can completely change the way the photo looks. Here are a few common lighting directions and their effects:
Front Lighting
When the light source is directly in front of the subject, it illuminates the entire subject evenly. Front lighting creates soft shadows, reducing texture and making subjects appear flatter. This type of lighting is often used for portraits, as it provides an even, flattering look. However, it can sometimes make the image appear less dynamic and flat if overused.
Side Lighting
Side lighting occurs when the light hits your subject from the side. This lighting direction creates strong shadows and highlights, adding texture and depth to your photo. It’s especially effective for creating dramatic portraits, enhancing the details of your subject’s features, and adding a sense of dimensionality to landscapes.
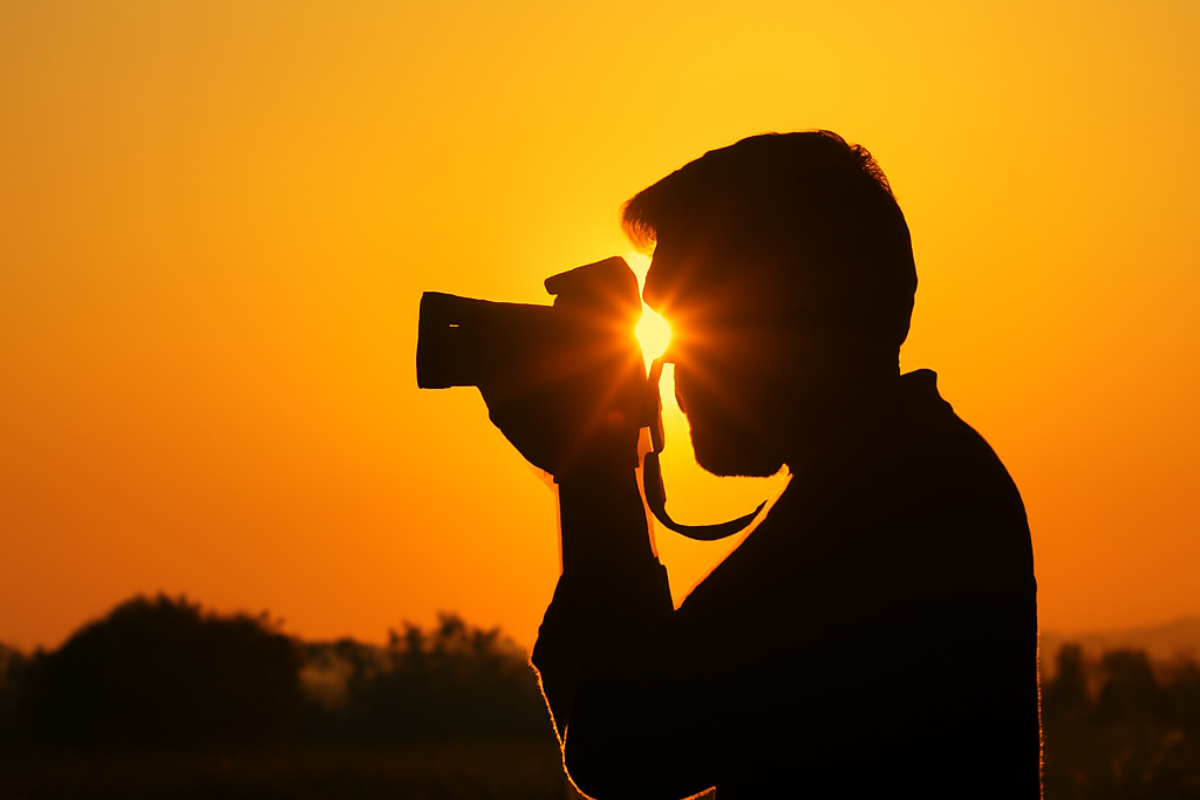
Backlighting
Backlighting happens when the light is behind your subject, creating a silhouette effect. This technique can be stunning for dramatic shots, but it requires careful control of exposure to prevent the subject from becoming a dark shape. Backlighting can also create a beautiful rim light around the subject, adding a glowing halo effect.
Top Lighting
Top lighting is when the light source comes from directly above the subject. It is commonly seen in overhead lights, and it can produce sharp shadows under the eyes, nose, and chin, which may not be flattering for portraits. However, top lighting can be used creatively for specific effects, such as in architectural or still-life photography.
Under Lighting
Under lighting is a less common technique but can be used for creative or dramatic effects. The light is placed below the subject, casting unusual and often eerie shadows. This technique is used in certain types of horror or creative portraiture to give an otherworldly look.
3. The Quality of Light: Hard vs. Soft Light
The quality of light refers to how harsh or soft the light is. This aspect of lighting greatly affects the mood and texture of your images.
Hard Light
Hard light creates strong shadows and high contrast, making the textures and edges of your subject appear more defined. It’s produced by a small, intense light source, like the midday sun or a bare flash. Hard light is ideal for creating dramatic, bold images where you want to emphasize shape and form. However, it can be unflattering for portraits, as it highlights imperfections and creates deep shadows.
Soft Light
Soft light, on the other hand, diffuses the shadows and creates a more even, gentle illumination. It’s often achieved by using larger light sources or modifiers like softboxes or reflectors. Soft light is perfect for portraits, as it flatters skin tones and smooths out harsh features. It’s also used for still-life and product photography to avoid overly sharp shadows.
Understanding the difference between hard and soft light is key to mastering portraiture and other genres where you want to control mood and texture.
4. How to Use Light to Create Mood
Light has the power to influence the mood and emotion of a photograph. Whether you’re aiming for a warm, inviting feeling or a dramatic, mysterious atmosphere, light is one of your most powerful tools.
Bright and Airy Mood
To create a light, bright, and airy atmosphere, use soft, diffused light and keep your subject well-lit with minimal shadowing. Shooting during the golden hour or using large light sources will help create this effect. This type of lighting is often used in lifestyle photography, weddings, and family portraits.
Dark and Moody Mood
To create a more dramatic, moody atmosphere, use hard light, shadows, and contrast. A darker, more dramatic setting will benefit from stronger, focused light sources and minimal fill light. Backlighting, side lighting, or chiaroscuro lighting techniques (light and shadow) are commonly used for this effect in portrait and fine art photography.
Natural and Neutral Mood
Natural light creates a neutral, realistic feel in your photos. For this type of mood, aim to shoot during the day in well-lit areas, preferably using indirect sunlight. You can also use soft artificial light to mimic daylight indoors.
5. Experimenting with Light: Tips for Mastery
Here are a few practical tips to help you become more skilled at using light in your photography:
- Use Reflectors: Reflectors are an easy way to bounce light onto your subject, softening shadows and filling in darker areas.
- Use Modifiers: Softboxes, umbrellas, and diffusers can help soften hard light, making it more flattering.
- Adjust Your Exposure: If you’re shooting in bright light, adjust your exposure settings to avoid overexposing your photos. In low light, boost your ISO or use longer exposures.
- Try Different Times of Day: The light changes throughout the day, so try shooting at different times to see how the light shifts. The golden hour, for example, provides warmer, softer light, while midday can offer sharp, high-contrast light.
Conclusion
Mastering light is essential for becoming a skilled photographer. By understanding the different types of light, the direction of light, and how light quality impacts your photos, you can make more creative decisions in your work. Whether you’re using natural light or artificial light, the way you control and use light can elevate your photos from good to extraordinary. Keep experimenting, and don’t be afraid to push the boundaries of light to achieve the perfect shot.